Battle of Spica 2144
Turn 8
Background:
 The Eurasian Solar Union 4th Fleet was created by the simple expedient of cutting some ships loose from 2nd Fleet to send to reinforce 3rd Fleet as it made its dash to Dubhe. CINC 2nd Fleet Kontr-admiral Zinoviev made use of this necessity to engage in a little housekeeping, ridding himself of the irritating 2nd Kapitan Zaneta Ma by placing her in command of the new formation.
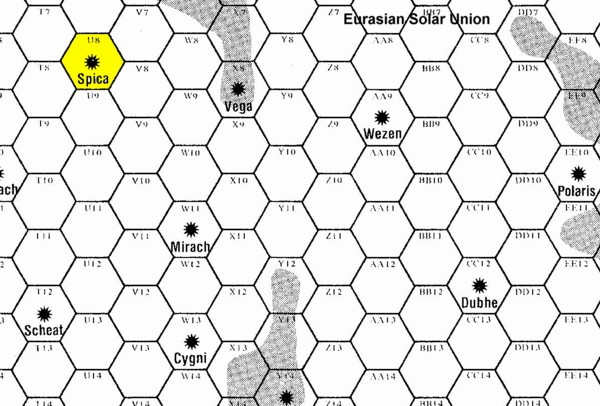
Heading Rimward to join 3rd Fleet, Kapitan Ma plots a course via Spica system, explored just the year before by 2nd Fleet. Beyond Spica lies the long 8 parsec voyage to Dubhe and 3rd Fleet.
Spica system consists of eight orbits. Orbits 1 and 2 are occupied by two small, uninhabitable, rocky worlds, orbit 3 contains a Terran type world the ESU intends to colonise in the future, and orbit 4 has a Sub-Terran world. The outer system lies beyond a planetoid belt (orbit 5) and consists of two large gas giants separated by a small gas giant.
ESU Situation:
4th Fleet enters Spica system, passing through on the long haul to Dubhe. While there has been action and engagements in the Dubhe sector, the ESU has not encountered hostile fleets elsewhere. Consequently, watch-keeping is lax as the FTL drives go through their cycle.
Suddenly, the alert is sounded from the Burun, travelling a little ahead of the rest of the formation. Unknown vessels have been detected in the Spica system.
If Kapitan Ma can win the initial Initiative (as a Poor officer, she has a -1 on Initiative), she can determine the engagement location within the system. Her choices are: Free Space, near a Dense world, near a Gas Giant, or in an Asteroid Field.
Kapitan Ma's objective is simple, to escape the hostile ships in the Spica System so that ESU High Command can be alerted to their presence, and to complete her mission to bring reinforcements to 3rd Fleet at Dubhe.
4th Fleet consists of:
| Warsaw class Destroyer Bialystok |
| Novgorod class Frigate Burevestnik |
| Nanuchka II class Corvette Burun |
The Bialystok is serving as flagship.
2nd Kapitan Ma is a Poor Officer, 3rd Kapitan Mikhail Frolov of the Burevestnik is a Good Officer and Kapitan-leytenant Elga Eikhe of the Burun is an Average Officer.
Kra'Vak Situation:
Huntleader Ti'uk of the 1st Host of the Kra'Fas'Kon has been patrolling Coreward of the Kra'Fas lairworld of Zha'Lau in the Almach system. Sweeping through the Spica System, his kon's scout has picked up unknown ships. As the scan data comes in, Ti'uk orders an immediate attack.
1st Host consists of:
| Yu'Kas class Superdreadnought Kia'Zes |
| Va'Dok class Heavy Cruiser Va'Lak |
| Da'Kak class Heavy Frigate Di'Fan |
| Da'Kak class Heavy Frigate Ko'Tol |
| Lu'Dak class Scout Lu'Tek |
The Kia'Zes is serving as flagship
The captains of the Ko'Tol and Va'Lak are Good Officers, while all other officers, including Huntleader Ti'uk, are Average officers.
If Huntleader Ti'uk can win the initial Initiative, he can determine the engagement location within the system. His choices are, Free Space, near a Dense world, near a Gas Giant, or in an Asteroid Field.
Huntleader Ti'uk's objective to capture or destroy the hostile ships in Spica System while ensuring his own ships are not needlessly damaged.
| Points/Mass: |
| Kra’Vak: | 1512 Points | 384 Mass |
| Eurasian Solar Union: | 214 Points | 64 Mass |
Ships Used:
All Eurasian Solar Union ships in this engagement were Fleet Book 1 standard.
All Kra’Vak ships were Fleet Book 2 standard
Historical Result:
Pretty much as expected, Huntleader Ti'uk won the initiative. The result was a Pursuit Battle in Free Space.
Kapitan Ma's heart sank as scan revealed the advancing behemoth of the Kia'Zes. Deciding that she was unable to engage, Ma ordered a turn away to port and that all ships rig for FTL.
All this succeeded in doing was cause the Kra'Vak to drift to starboard as they corrected their approach vector, while Ma's manoeuvre resulted in the ESU main Beam Batteries being out of arc, even as the ships desperately accelerated away.
Tightening her turn away, Ma suddenly found herself in range of the fearsome K-guns. Bialystok disappeared in a flash of fire, neatly solving Kontr-admiral Zinoviev's problem, though possibly not in the fashion he had anticipated. Burevestnik and Burun were pounded within inches of their lives, and both ran on with wrecked bridges, Burun's Power Core failing, and both ships Life Support collapsing.
Huntleader Ti'uk grunted with satisfaction as he ordered the killing blow - his ships had not taken a single hit and the enemy had been completely obliterated.
Note:
As the sides differed so greatly in strength, I actually played this as a solo game, working out several strategies and then using the Officer rating to select the most likely.
Reverse course to "Battles of the Campaign" page
 The Eurasian Solar Union 4th Fleet was created by the simple expedient of cutting some ships loose from 2nd Fleet to send to reinforce 3rd Fleet as it made its dash to Dubhe. CINC 2nd Fleet Kontr-admiral Zinoviev made use of this necessity to engage in a little housekeeping, ridding himself of the irritating 2nd Kapitan Zaneta Ma by placing her in command of the new formation.