Battle of Corolis Vale
09/07/25 During a bout of unemployment/job hunting, I finally finished reading my copy of Midgard Heroic Battles by John Morris and decided to have a solo game to try out the rules. The rulebook contains a selection of scenarios so I opted for Scenario 2: None Shall Pass
Using the handy dandy on-line force creator app, I created two opposing sides for my battle:
Rules: Midgard Heroic Battles
Scale: 15mm
Table Size: 77cm x 140cm
Ground Scale: 1 Spear Throw = 80mm
Game Size: Dwarves – 209 points vs Orcs – 298 points (as per Scenario 2, None Shall Pass)
Background:
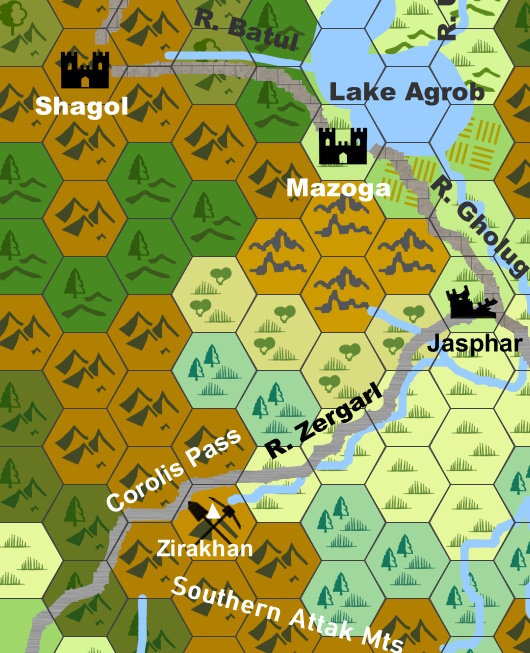
North-western part of the Olde Worlde
In the 943rd Year of King Deldrach of Ruvaen, in the spring following the Battle of Uram and the death of Grogmar Khan of Mt Durfang, in the month of the Peregrin, Zulgore of the Mighty Arm, Warleader of Shagol, led a band of Orc marauders south over the Central Attak Mountains.
Making their way through the forested hill country of the northern Zergarl Valley, they picked up the Jasphar road some 20 miles west of that ruined town. Turning west, Zulgore's band made their way towards the Corolis Pass, aiming to raid the Dwarf mines of Fraegr's Folk at Zirakhan.
It so happened that Prince Grimbor of Fraegr's Folk was patrolling east along the Jasphar road with five banda of inexperienced and lightly equipped warriors when his scouts reported the advancing Orc band. Taking up a defensive position in the Corolis Vale where a bridge carried the road over a tributary of the River Zergarl, Grimbor prepared to bar the passage of the Orcs while a runner was dispatched to alert Zirakhan.
The Opposing Forces
The Dwarves:
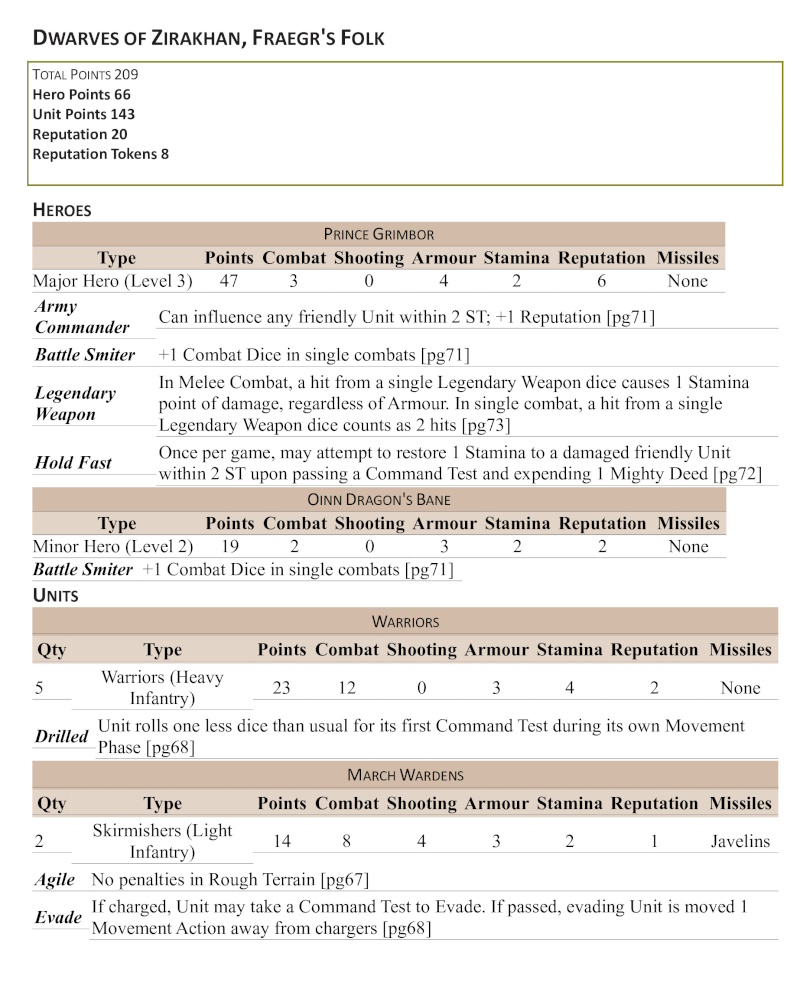
Prince Grimbor of Zirakhan is the Commander of the patrol force. He has standard Dwarf heavy armour (Factor 4) and is armed with the Legendary two-handed axe, Hodeknuser. His contingent consists of three banda of lightly armoured (Armour Factor 3) Dwarf Warriors and a bandon of March Wardens (Skirmishers).
Oinn Dragon's Bane is the other leader of the patrol and his contingent consists of two banda of Dwarf Warriors and a bandon of March Wardens.
The Dwarf Force numbers 2,500 Infantry and 500 Light Troops.
The Orcs:
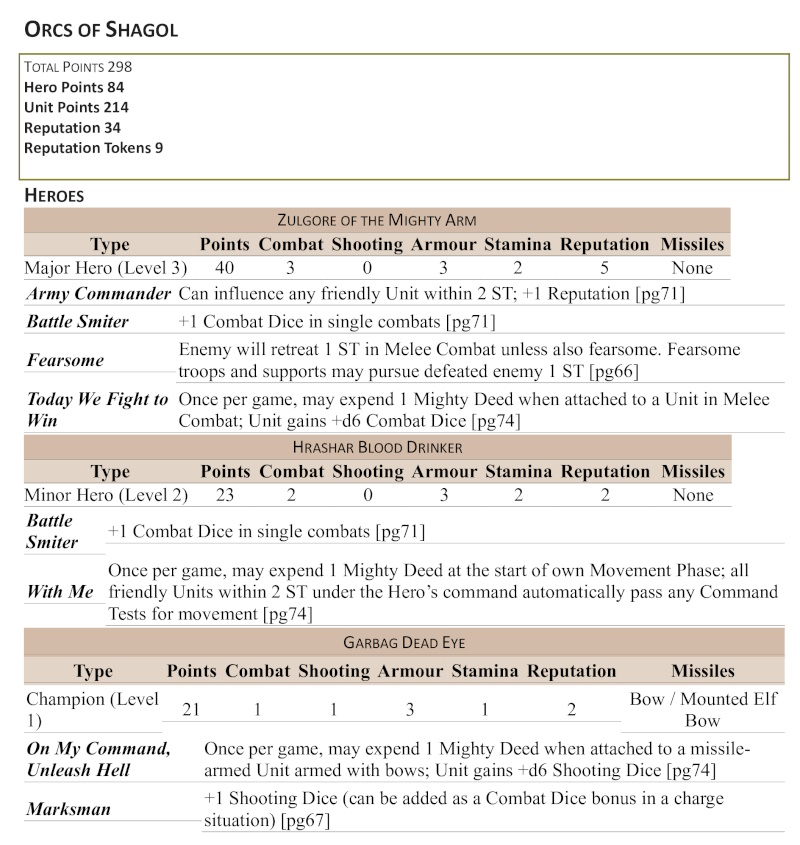
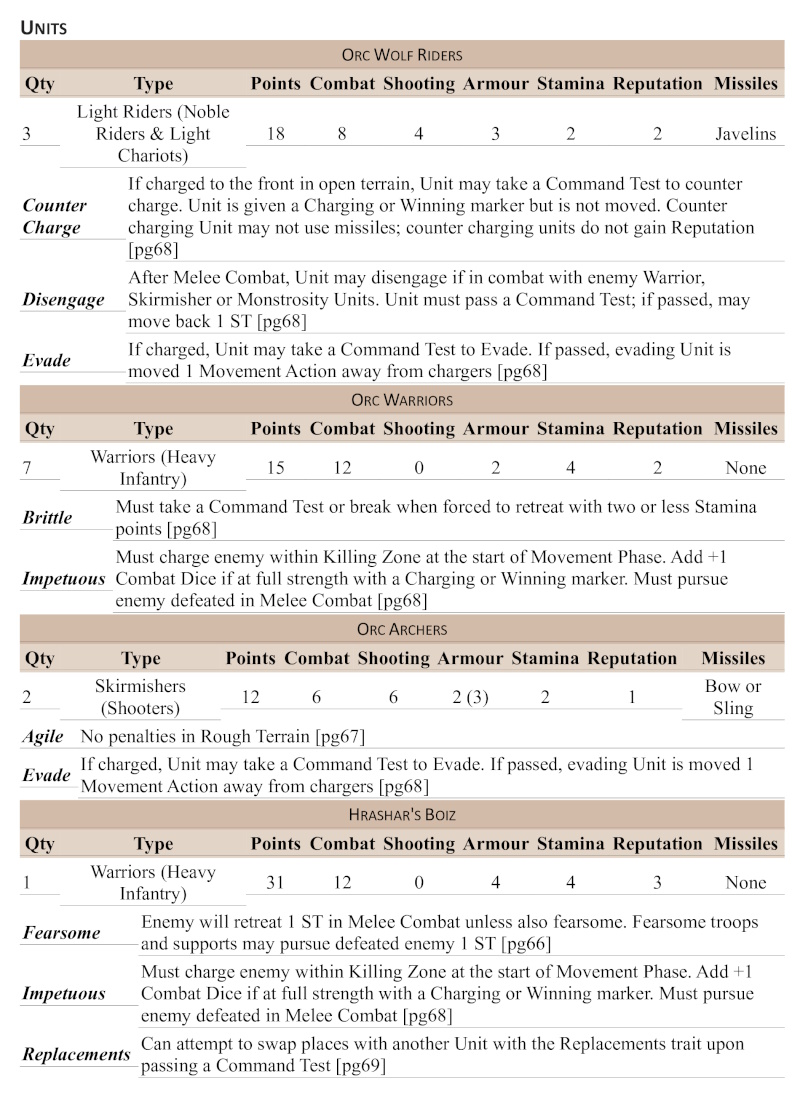
Zulgore of the Mighty Arm is the Warleader of Shagol, an Orc stronghold and city-state north of the Central Attak Mountains. The death of Grogmar Khan of Mt Durfang has shifted the balance of power amongst the Orc tribes of the Lake Agrob basin and Zulgore is attempting to bolster both his own position and that of Shagol with a quick raid south against the Dwarves of Zirakhan. He is a Fearsome warrior as well as a canny fighter. His contingent consists of 4 units of Orc warriors and a unit of Orc Wolf Riders.
Hrashar Blood Drinker is a Great Orc Brawler. His contingent consists of two units of Orc Wolf Riders, his personal retinue of Great Orcs - Hrashar's Boiz - and a unit of Orc Archers.
Garbag Deadeye's contingent consists of three units of Orc warriors and a unit of Orc Archers.
The Orc raiding party numbers 4,000 Infantry, 750 riders and 500 Light Troops.

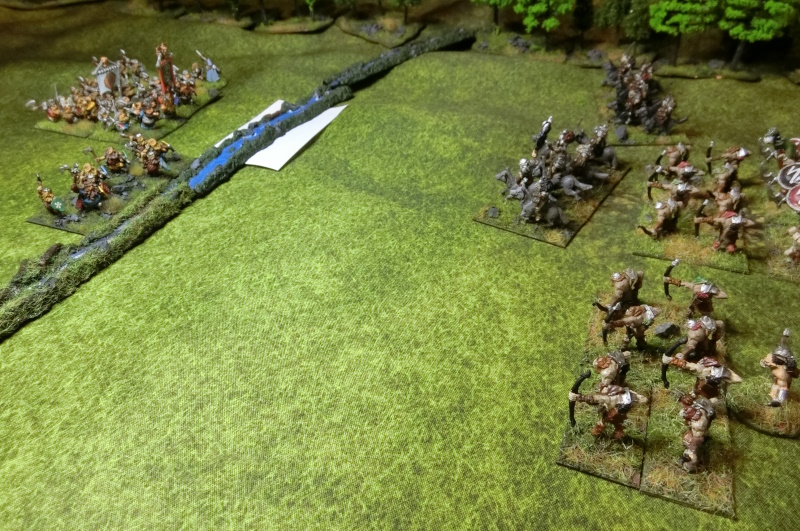
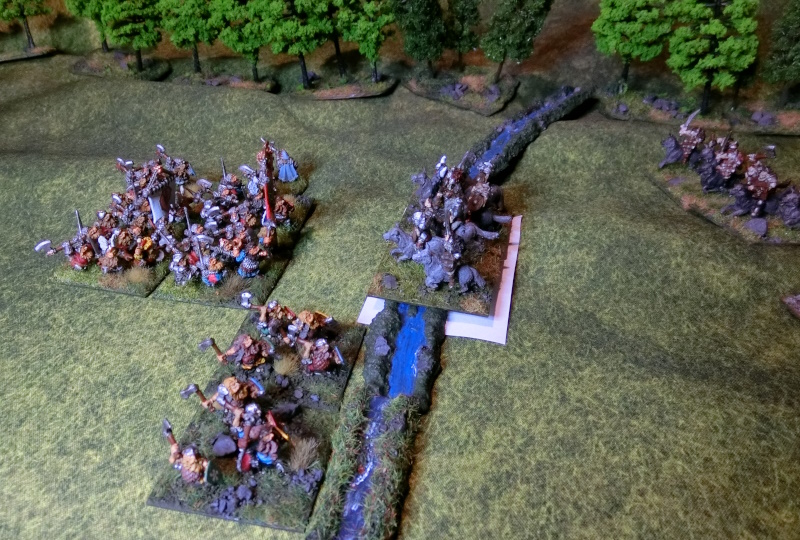
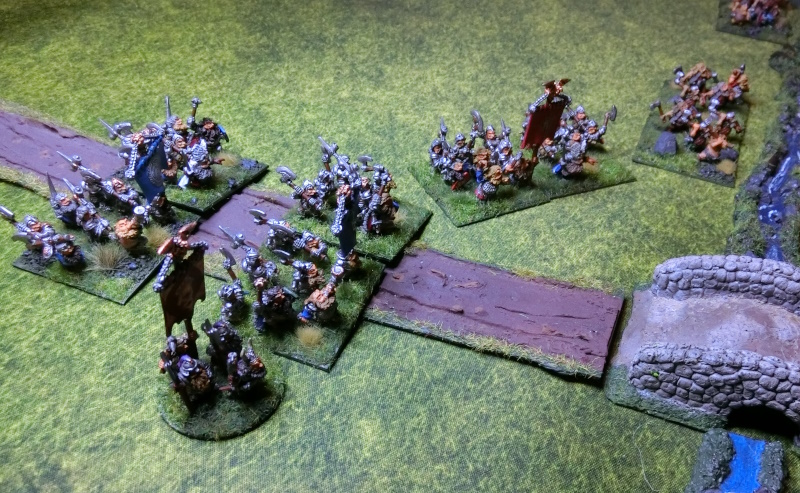
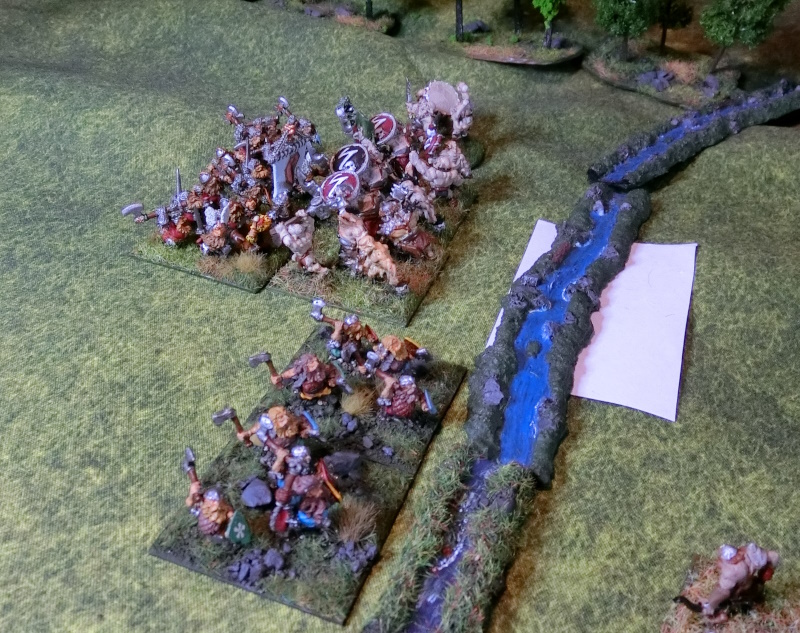
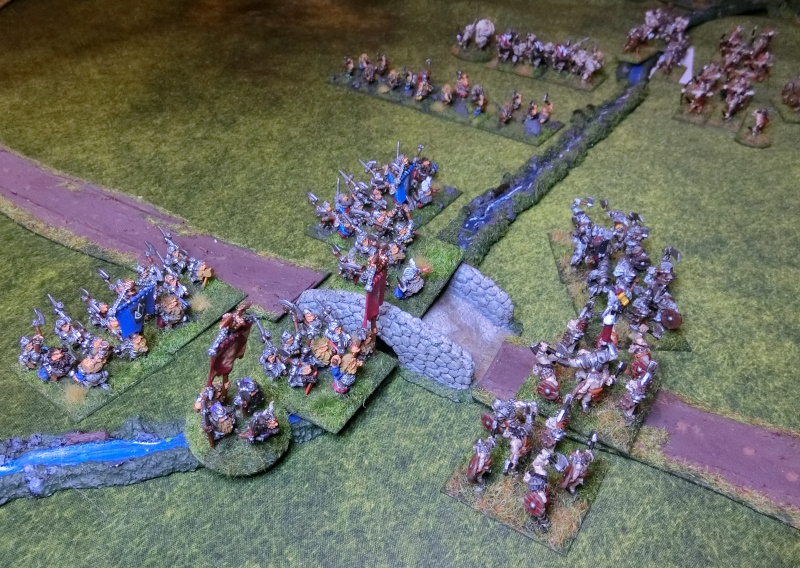
Prince Grimbor set up a defensive line in the Corolis Vale where a bridge carried the Jasphar road over a tributary of the River Zergarl. Prince Grimbor's banda formed up, defending the bridge, while Oinn Dragon's Bane's banda defended the ford near the northern edge of the Vale.
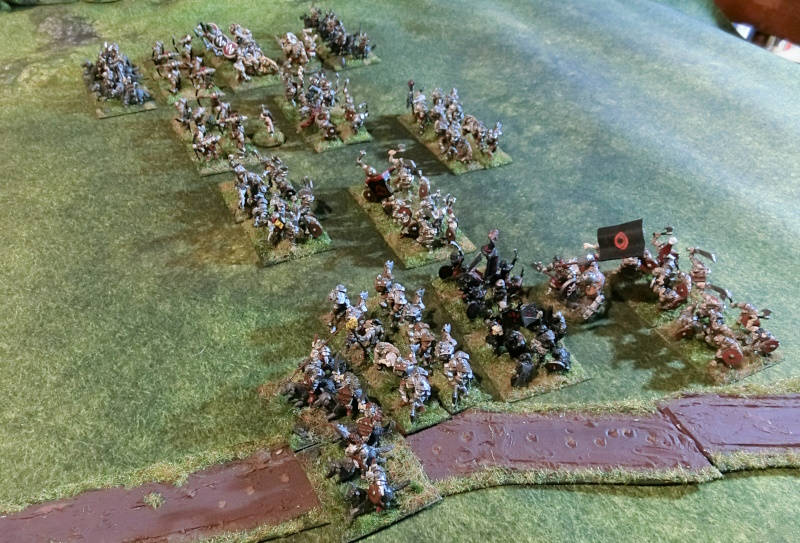
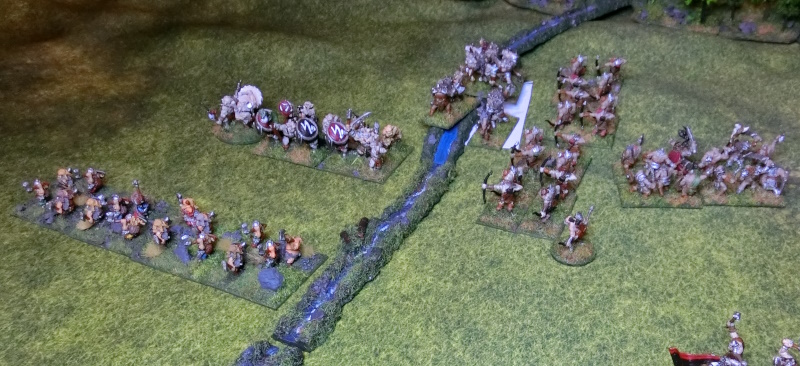
Approaching from the east along the Jasphar Road, Warleader Zulgore's Shagoli force begins to deploy as the Vale opens up. Zulgore's contingent proceeds along, or close to, the road - a body of Orc Wolf Riders leading two units of Orc foot, followed by Zulgore himself, with his red eye banner, and another group of Orcs bringing up the rear. The last unit of Zulgore's contingent marches parallel with the unit of Black Orcs.
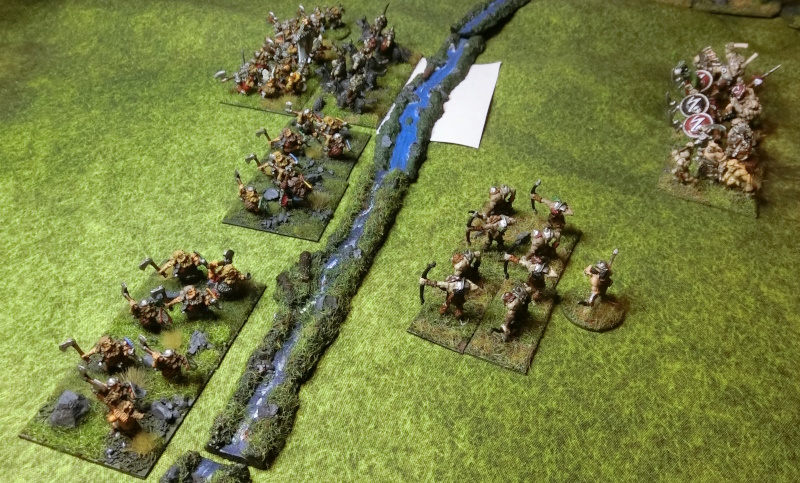
Garbag Deadeye marches with his unit of archers while his three Orc units march around him.
On the right flank, Hrashar's column has Orc Wolf Riders front and back, with his unit of archers leading his Great Orc unit.
On both flanks, the Orc Wolf Riders press ahead of the advancing Orc force.
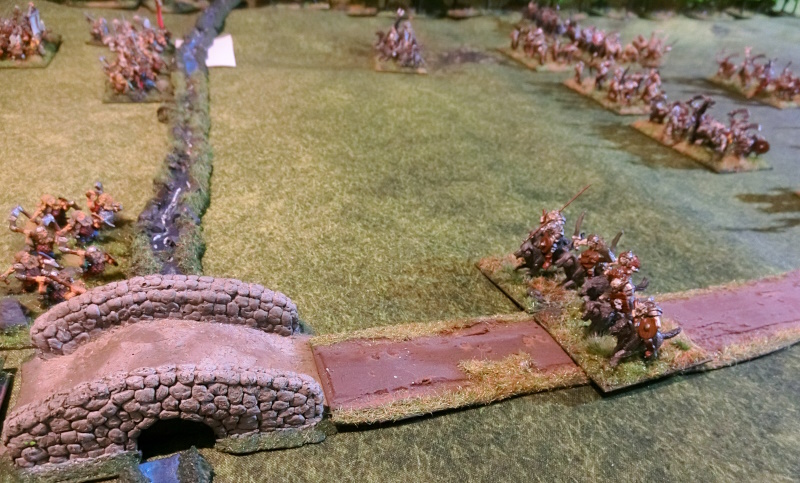
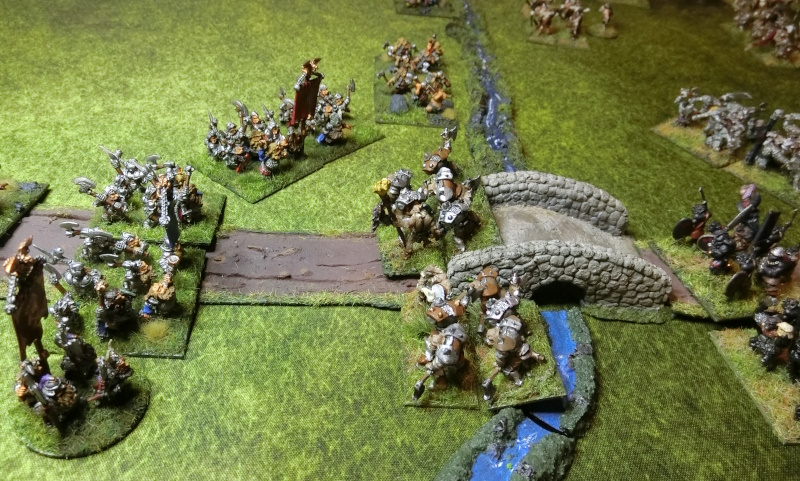
On the right flank, Hrashar sends his Wolf Rider rear guard around the flank of his infantry to support his leading unit of Wolf Riders. On the left flank, Zulgore joins his unit of Wolf Riders as they approach the bridge.
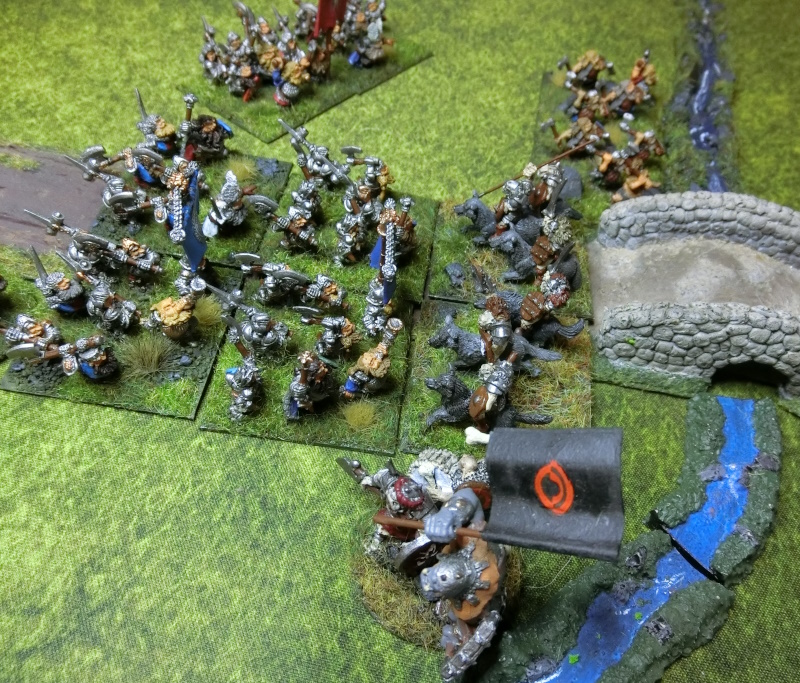
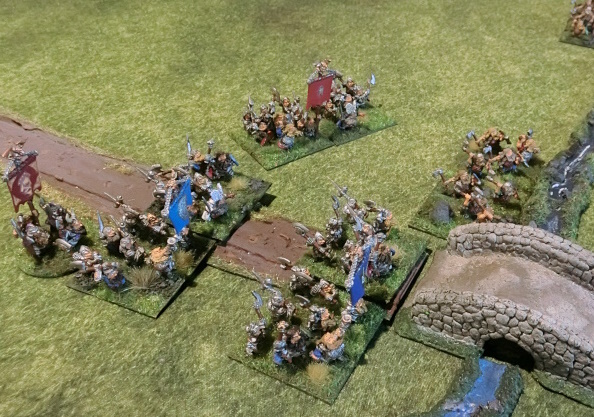
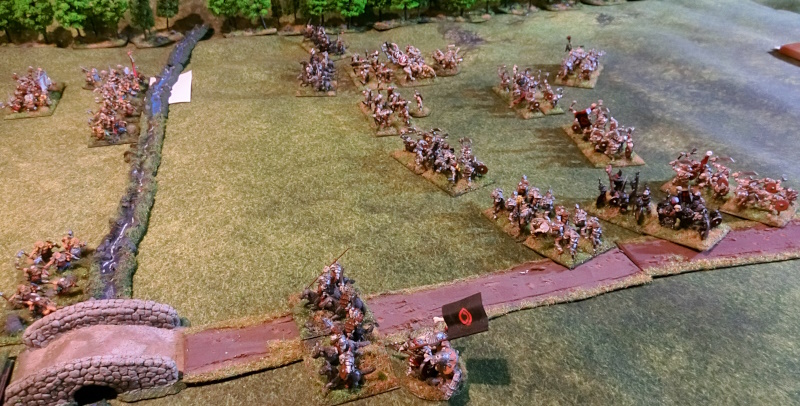
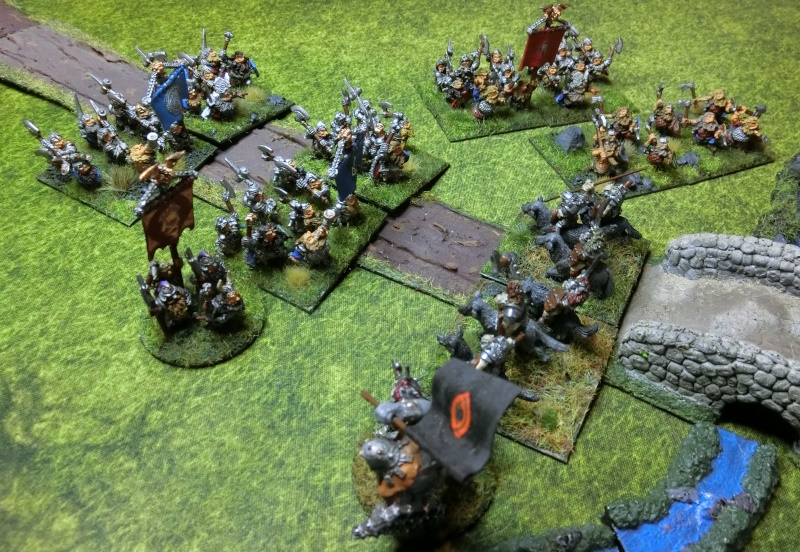
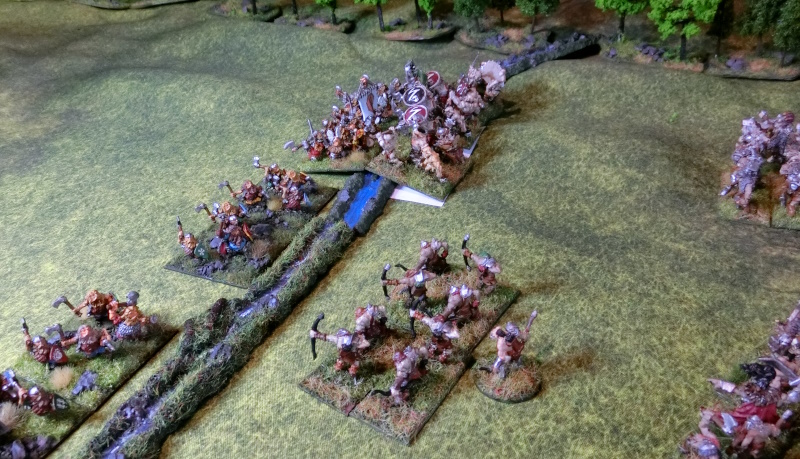
Zulgore's Wolf Riders charge across the bridge, pushing the first bandon of Dwarves back against their support.
The fearsome Zulgore, with his troll banner bearer, are in the thick of the fighting.
Both banda of Dwarves are forced back by the fearsome Zulgore, and both lose Stamina due to being forced back into each other.
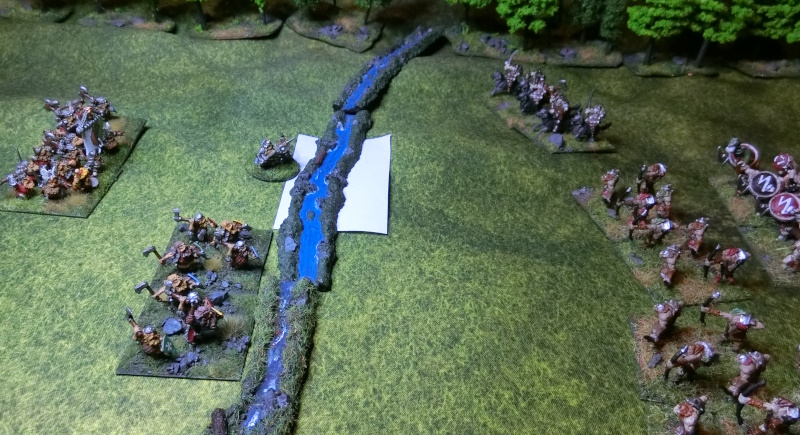
On the right flank, the Wolf Riders close in on the ford.
At the bridge, Grimbor reorganises his defences. His March Wardens drop back and fire on the Wolf Riders, wounding Zulgore while Grimbor joins his battered lead bandon.
Garbag's archers drive the defending Dwarves back from the stream. And then the Wolf Riders on the right seize the ford. Flinging javelins at the withdrawing Dwarves, the Wolf Riders wound Oinn Dragon's Bane.
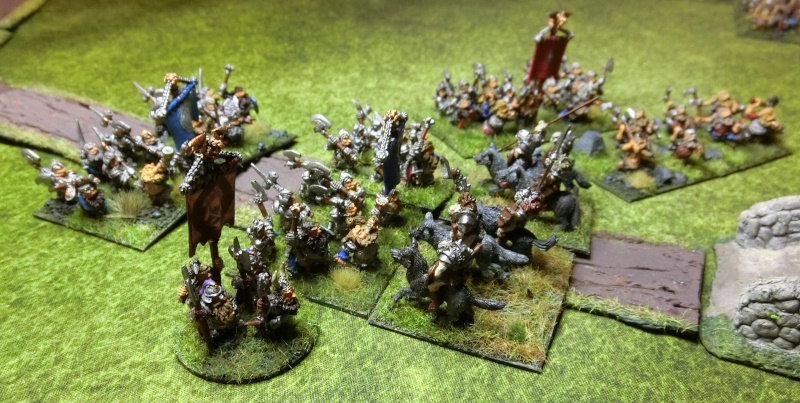
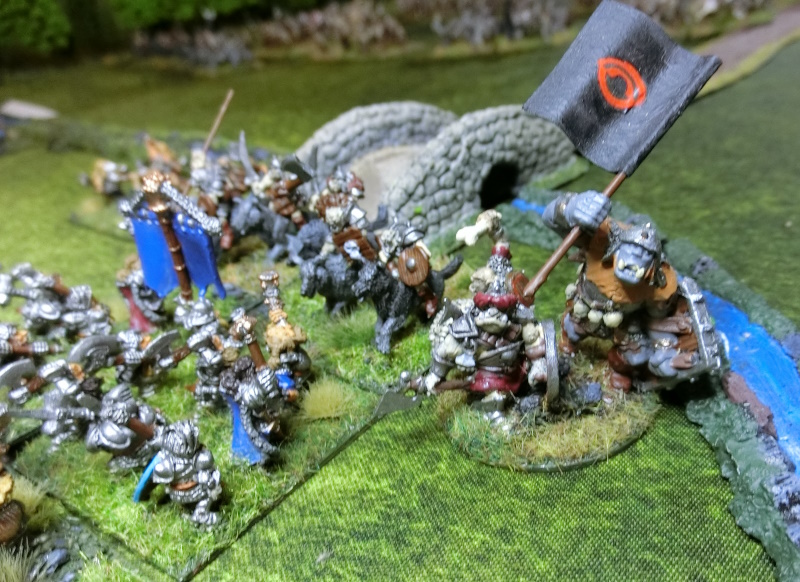
Meanwhile, Zulgore's Wolf Riders charge Grimbor's Dwarf bandon while Zulgore challenges Grimbor to a duel. There is fierce fighting upon the Jasphar road as the Dwarf bandon and the Wolf Riders remain locked in combat. Both heroes suffer wounds before Grimbor smites Zulgore with a mighty blow. The Legendary Axe Hodeknuser cleves Zulgore in twain and he is food for ravens.
At the ford, Oinn leads his bandon in a charge upon the Wolf Riders. In a fierce fight both the Dwarf bandon and the Wolf Riders are dispersed, leaving Oinn to hold the ford by himself.
At the bridge, the Red Dwarf bandon charges into the battle with the Wolf Riders. The two Dwarf banda throw the Orcs back, who then disperse.
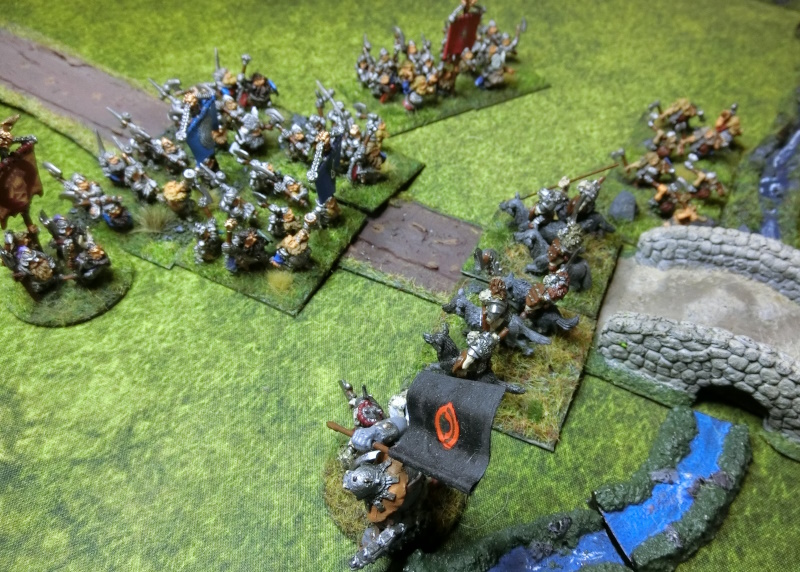
Even as the Orc Wolf Riders disperse, Zulgore's Orc Infantry come racing over the bridge.

Manoeuvring his battered Blue bandon onto the flank, Grimbor leads the Red bandon in a charge against the fresh, Yellow Claw, unit of Orcs on the bridge.
Meanwhile at the ford, Oinn evades the charge of Hrashar's second unit of Orc Wolf Riders and joins his remaining Dwarf bandon as the Wolf Riders charge home. In a sharp action, the Dwarves drive the Wolf Riders back to the ford, before dispersing them.
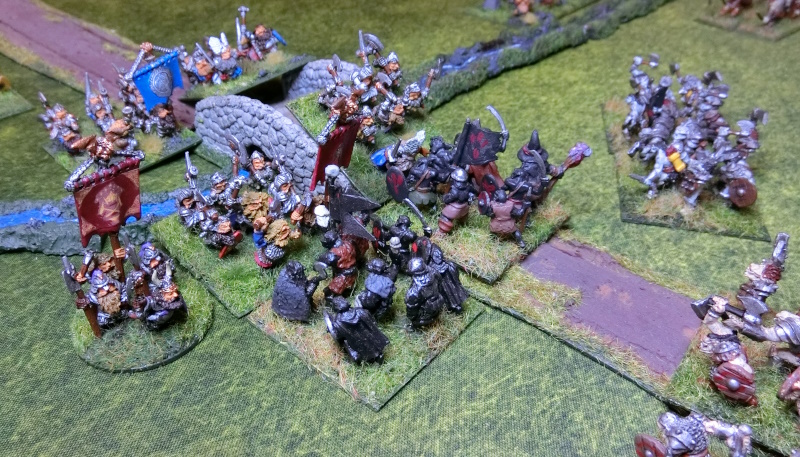
Having dispersed the Yellow Claw Orcs, Grimbor leads the Red Banner Dwarf bandon over the bridge, charging the Black Orcs.
Oinn and his bandon hold the ford as Hrashar's Boiz move up. Oinn leads his bandon in a charge against the Great Orcs and challenges Hrashar to a duel. In a brief combat, Oinn is food for ravens. His bandon is pummeled by the Fearsome Great Orcs and falls back in disarray.
Following up the retreating Dwarves, Hrashar's Boiz slaughter them, though Hrashar himself is wounded.
Having dealt with the last of Oinn's infantry, Hrashar's Boiz turn south and advance on the bridge. The March Wardens fall back before them, peppering them with javelins and throwing axes.
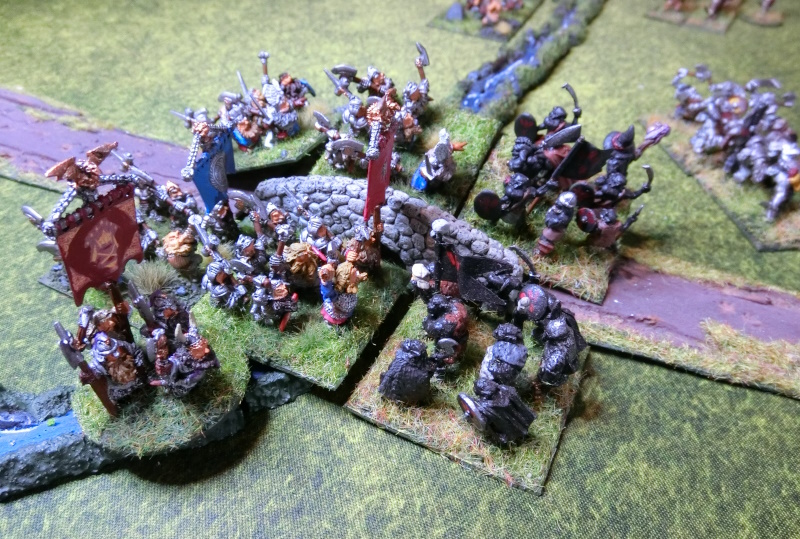
The Black Orcs push Grimbor's bandon back, but they remain locked in combat.
At the bridge, the Black Orcs throw themselves on Grimbor's bandon, but to no avail. Mighty Hodeknuser, like a flame, cuts through Orc ranks as Grimbor strikes to his left and strikes to his right. At last, the Black Orcs flee. And with their flight, the rest of the army follows them east along the Jasphar road and the hard trails across the Central Attaks to Shagol.
Afterword:
Well, what an epic finish - The Orcs ended up, at the end of Turn 7, with a Reputation of 0, while the Dwarves had a Reputation of 15 - gaining 1 Reputation each turn for either holding the ford or holding the bridge from Turn 3 onwards.
The Dwarves lost Oinn Dragon's Bane and two banda dispersed - 330 dead. The Orcs lost Zulgore of the Mighty Arm and five units dispersed (two Infantry and three Mounted) - 625 dead.
I'm sure I've made some mistakes with the rules, but I was able to get answers to questions from the rules writer very quickly through the Midgard Heroic Battles Facebook Group - it's a private group so you'll need to join to get all the fun stuff. I know I made some goofs while designing my units - the Dwarves didn't need Drilled as a trait, for example. But I should know better for the next battle.
I'm generally not a huge fan of "buckets of dice" games, but Midgard plays relatively quickly. I like how the number of hits has to exceed the target's armour to inflict a stamina penalty, and that the armour factor acts as a divisor for converting hits into stamina loses - eg three hits against Armour 3 = 1 stamina point, six hits = 2 stamina points, etc - so that increasing Armour from factor 2 to factor 3, for example, is quite an upgrade. I like how the Traits play out, none seem too over powering. As befitting "Dark Age Heroic warfare", missile fire does not dominate, but it can cause units to fall back and, more importantly, it can cause risk to Heroes. Support saves can really pull your bacon out of the fire, so keep your supports close, but allow room for combat units to fall back as required. Finally, the on-line Force Creator app by Pierre-Yves is a fantastic piece of coding and very useful for those of us who use Open Office and can't get Excel spread sheets to work properly.
Figures Used:
Dwarves:
All Dwarves are from Ral Partha Europe's Demonworld range. I picked up packs of Clan Veterans and Clan Warriors from the Demonworld Universal 18 subrange as these figures came in packs of 12, which better fitted my 40mm x 40mm basing. Additional leaders, heroes, standards, and musicians were bought as single figures.
Orcs
Orc infantry, wolf riders, and archers are from Splintered Light Miniatures, except the Black Orcs from Alternative Armies (now apparently only available in resin), and Hrashar's Great Orcs from Magister Militum, and currently not in production.